- Start page
- NEWly buily paintcan furnace June 2020
- Newly buily barrel furnace June 2018
- Videos from several experiments
- Home made fume hood
- Alloying nickel silver
- Making sphecical domes of silver
- Making a flat ring of silver
Making Potassium Chlorate
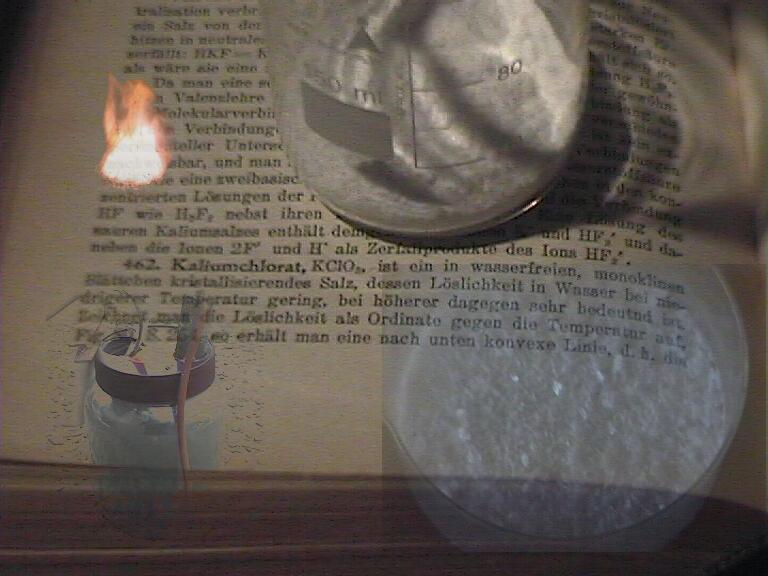
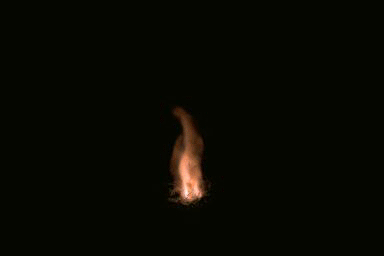
Burning sugar mixed with KClO3. Pictures taken with 0.5 seconds
interval.
Safety first Potassium chlorate (KClO3) is a strong oxidizer. Do not
heat or rub it with combustibles, like carbon, sugar, etc. With Phosphorus
or even sulphur in may ignite easily. Avoid contact with acids as
well.
Potassium chlorate (KClO3) is a strong oxidizer. Do not
heat or rub it with combustibles, like carbon, sugar, etc. With Phosphorus
or even sulphur in may ignite easily. Avoid contact with acids as
well.
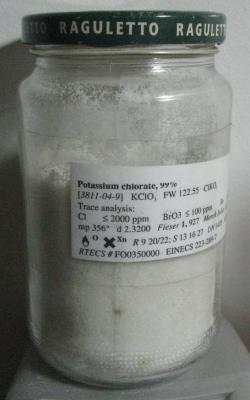
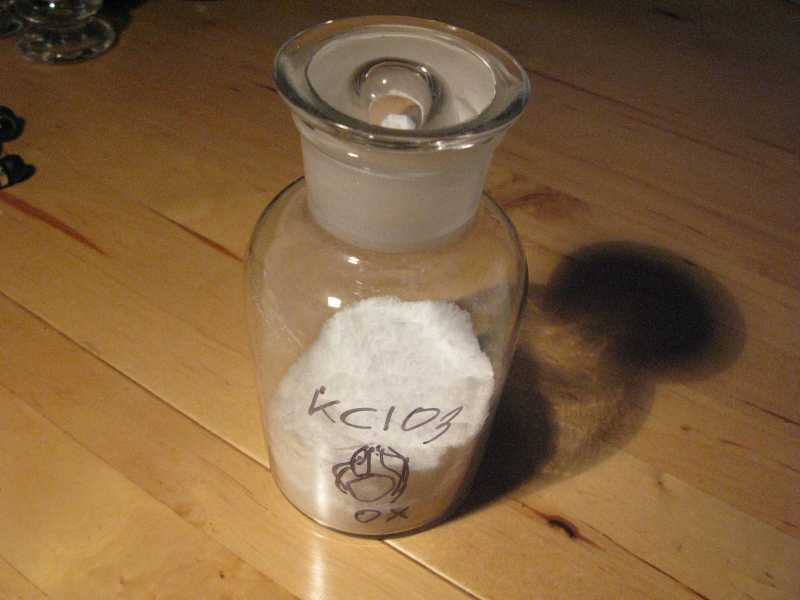
IntroductionPotassium chlorate KClO3 (also called Potassii Chloras or Kalii Chloras or Chloras Kalicus/Potassicus) is the potassium salt of chloric acid and is an oxidizer, used in chemistry to produce oxygen, but also used in fireworks. It is obtainable at chemicals supply shops, such as Merck or other large suppliers. It used to be available at the local chemist but this is getting harder and harder. With rather simple means you can make this yourself by electrolysis. Due to its poor solubility of 5 % in cold water, compared to sodium chlorate and chlorides, it is to prepare rather purely.Needed
| |||||||||||||||||||||||||||||||||||||||||||||||||||||||||||||||||||||||
Experiments January 2018
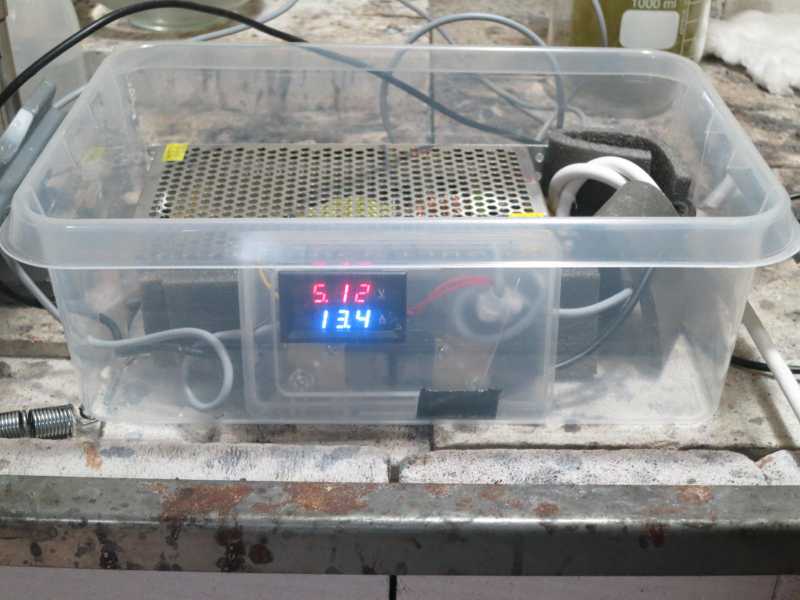
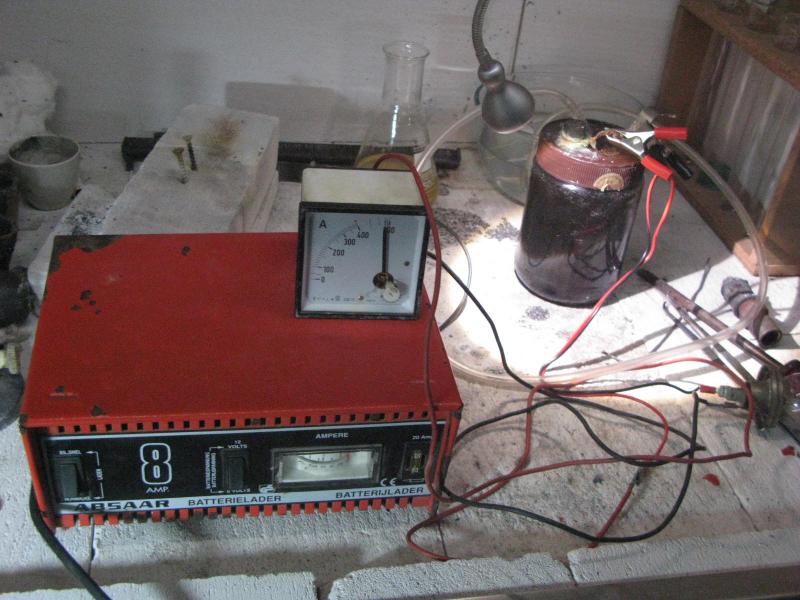
The old power supply (an 8 Amp. car battery charger) was finally deceased. It was too unstable and drew almost the same power from the mains (110W) when running 5V 8A than the new PS with 5.5V 18A which consumes 130W.
Experiment January 2012 (video)Making Potassium Chlorate Jan 2012 Making Potassium Chlorate by electrolyzing Diet Salt (67% KCl) using an MMO anode. Here a video I took in Jan 2012 with another electrolysis session. For more info see below. Making Potassium Chlorate by electrolyzing Diet Salt (67% KCl) using an MMO anode. Here a video I took in Jan 2012 with another electrolysis session. For more info see below.
Making Potassium Chlorate Oct 2018 Making Potassium Chlorate by electrolyzing Diet Salt (67% KCl) using an MMO anode. Here a video I took in Oct 2018 with a timelapse of the filtering of the solution.
| |||||||||||||||||||||||||||||||||||||||||||||||||||||||||||||||||||||||
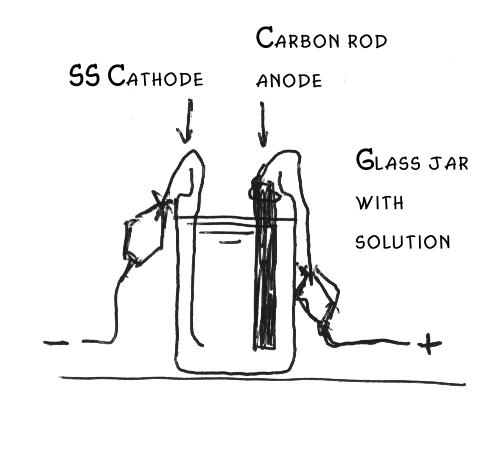
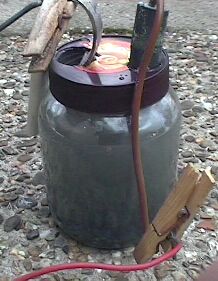
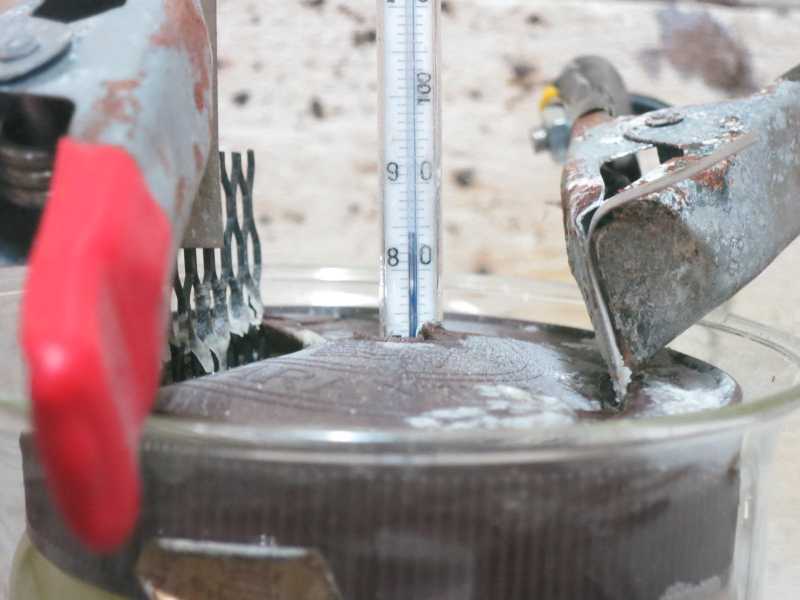
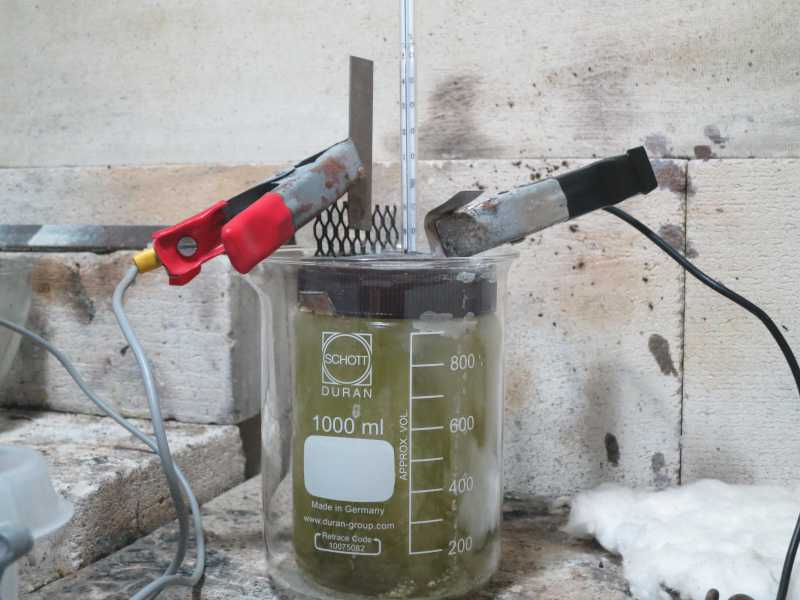
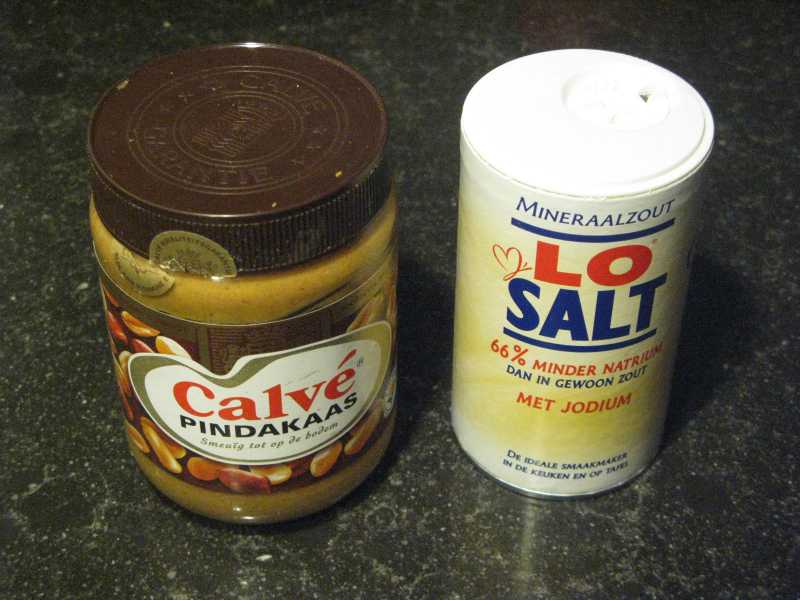
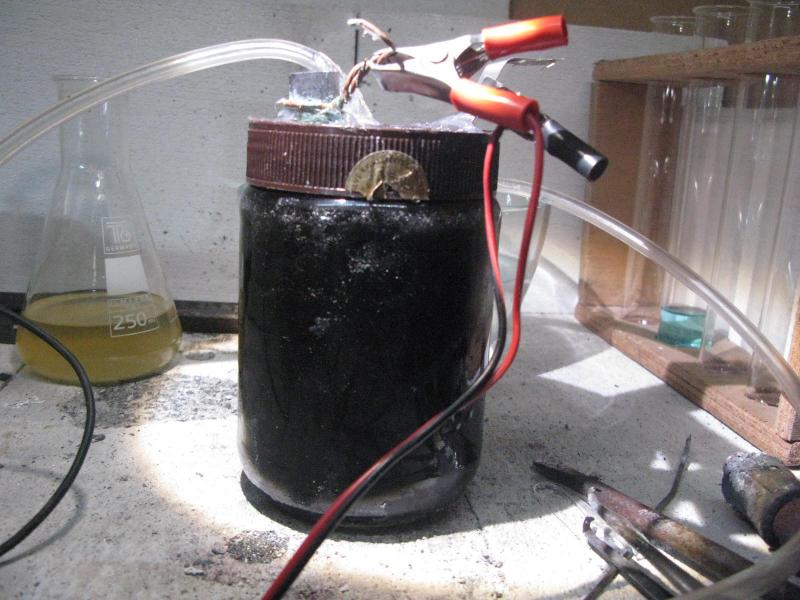
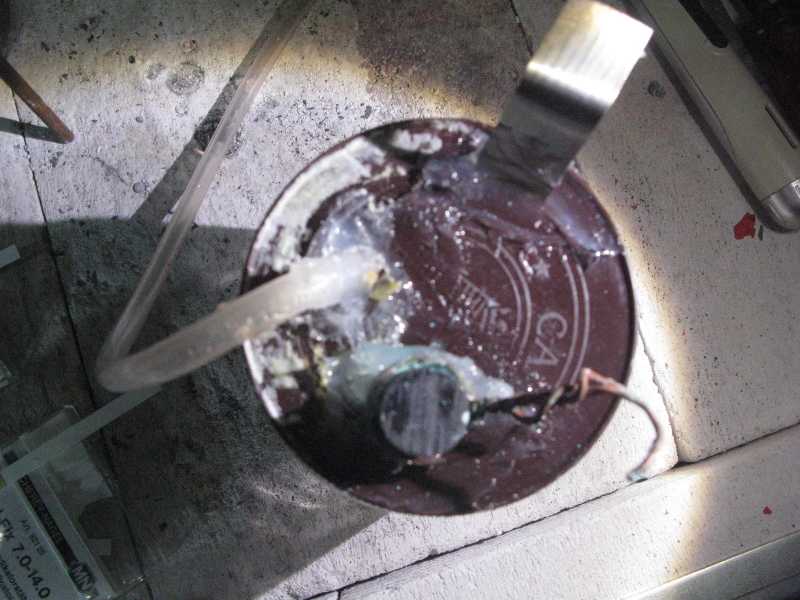
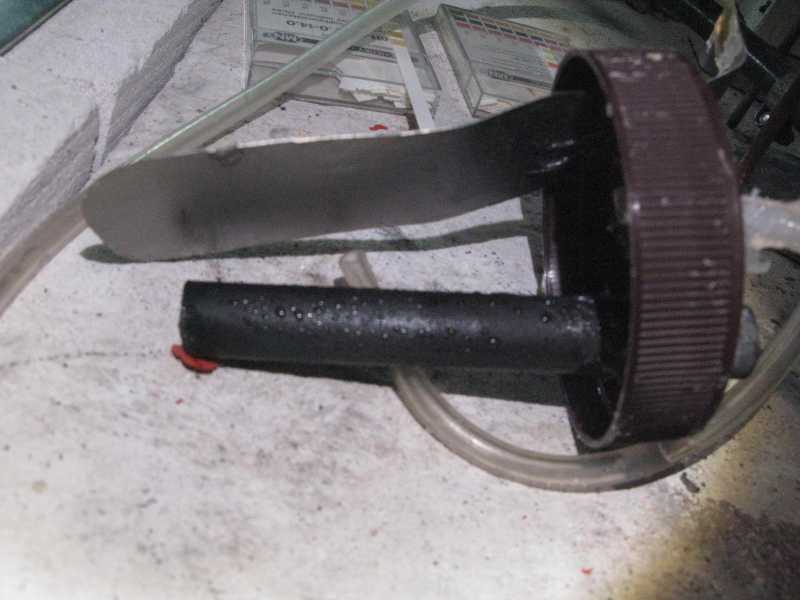
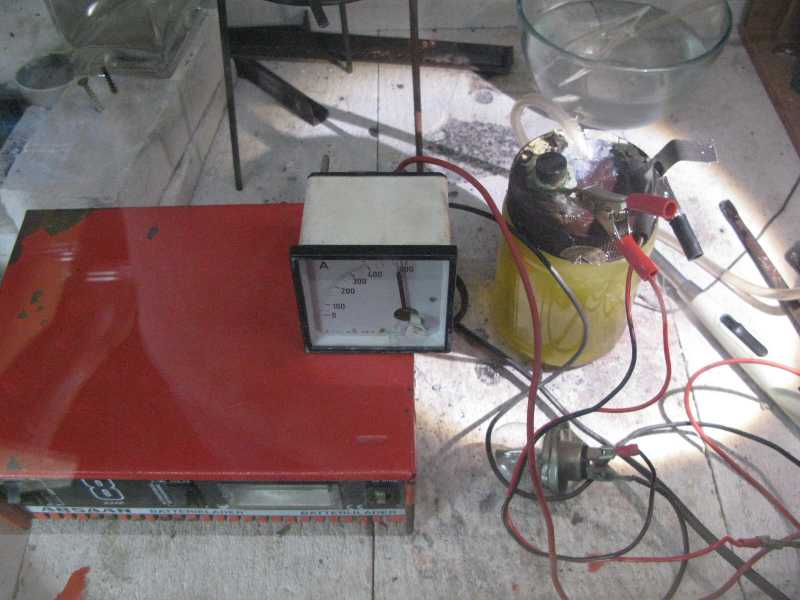
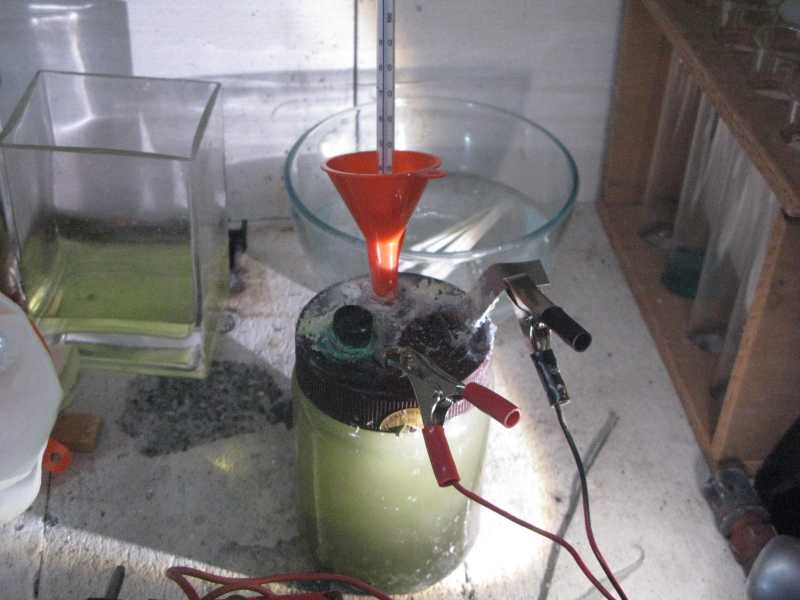
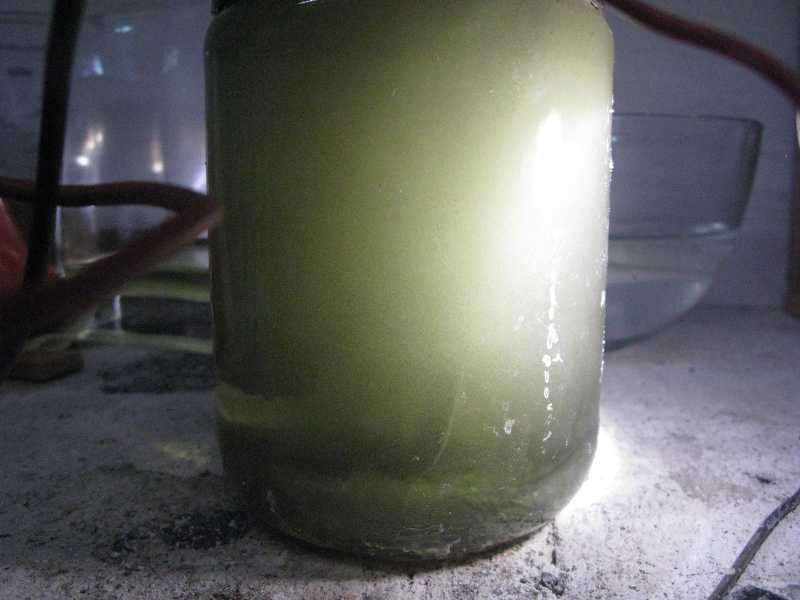
Experiments January 2011These experiments I still did with the good old carbon rod method while I am waiting for delivery of the MMO anode I ordered. An extensive discussion on this subject (MMO anodes) is on the Sciencemadness forum. I perform all these experiments in the fumehood due to some escaping chlorine gas. When the process goes well not much Cl2 gas escapes, a mere 'swimming pool smell' is detectable inside the fumehood. Starting with the same setuo as 10 years earlier using a 500ml "Calvé Pindakaas" peanut butter jar but now with the 16mm carbon rod and stainless steel sheet sealed into the lid and sealed with caulking agent (Yes it stinks to acetic acid CH3COOH during the caulking action...). And a PVC hose to release the gases (H2 and Cl2 and water vapor) into a water jar. After one hour of running at 10 A (voltage was lowering from 5.5 to 4.1 volts) the temperature of the bath raised to 60°C. The ammeter displayed on the picture is an 80/1 scaled ammeter so when it shows 800A it is actually 10A.
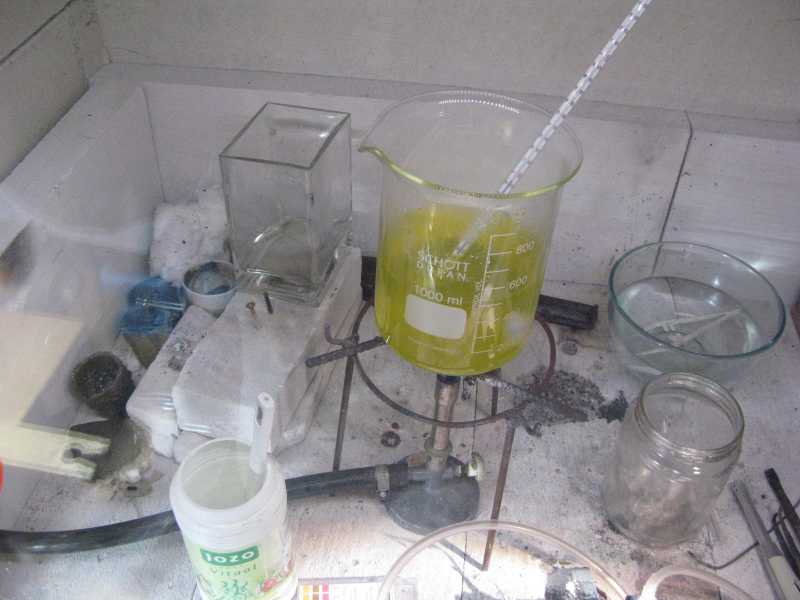
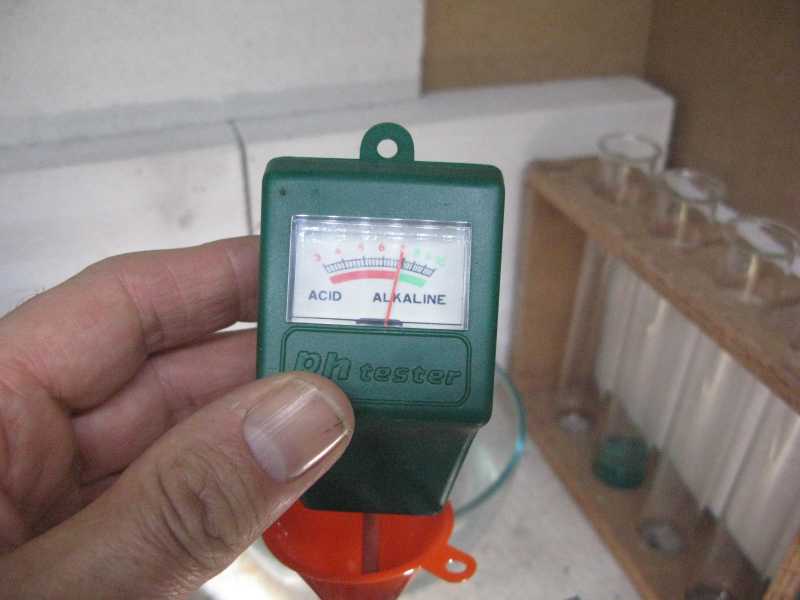
Next day I checked the pH with Mackerey-Nagel pH strips. I could estimate it is about seven so OK.However the strips look somewhat bleached due to the chlorine gas dissolved in the water. I dissolved some more JozoVitaal in the heated solution and poured it again into the peanut butter jar to start another session. I ran 9-10 amps again and the voltage was 3.6 volts. It seems that the higher the temperature, the lower the voltage.
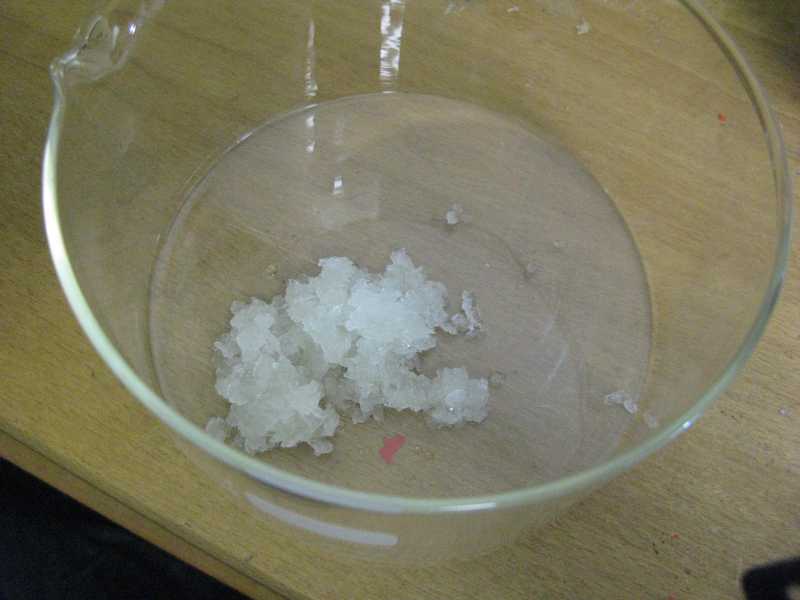
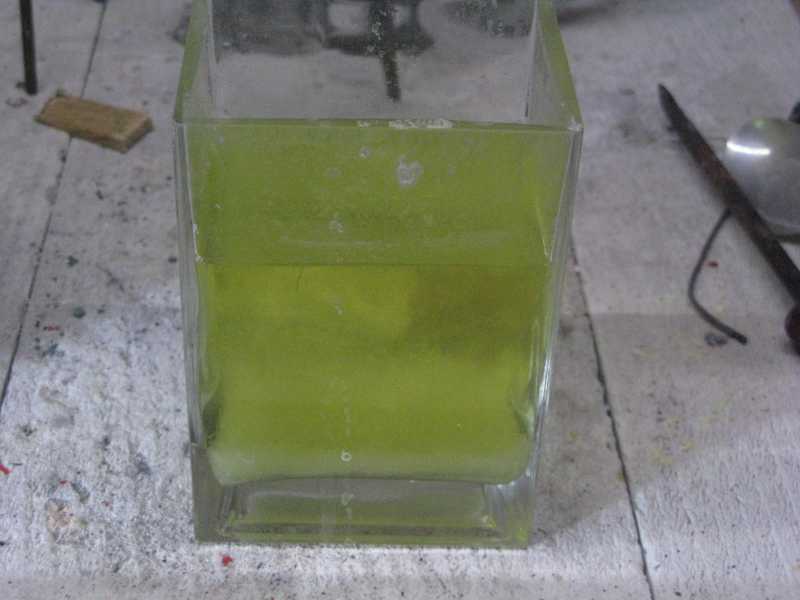
The following day I saw clear crystals on the bottom of the piss like solution. I put the glass container in the fridge and allowed it to cool further. Then while running a third session for 5 hours with newly added 'JozoVitaal' I poured off the solution and put the crystals ito a filter and rinsed them with ice-cold water to rinse off the remaining Na+ and Cl-, ad allowed it to dry for another re-crystallization to purify it. After a few more electrolysis sessions of 4 hours I collected all the (wet) crystals and dissolved in just ats much water that everyihing just dissolved at boiling. I let it cool outdoors (4°C) overnight and the next morning I poured off the still slightly yellowish liquid presumably NaClO3, KCl and NaCl dissolved. Then again I added som fresh water and again let it boil and then cooldown. After cooling I rinsed the crystals with cold water as the flame test after the first recrystallizaion turned out too sodium-yellow. After the second recrystallization and rinding again the flame color was OK. So I let it dry and scraped it out of the evaporation dish , rubbed it with mortar and pestle. Result 69g. I tested a little with sugar and with a lighter it catched (purplish pink) fire immediately. So is was OK.
| |||||||||||||||||||||||||||||||||||||||||||||||||||||||||||||||||||||||
Old experiments December 2000
How does it workElectrolyzing an alkali chloride solution results in the following reactions:
anode: 2 Cl- -> Cl2 + 2e
Now the trick: In commercial plants, chlorine gas and caustic soda NaOH is produced this way. A diaphragm should be put to prevent intermixing the OH- and Cl2, otherwise the OH- will react with the chlorine by: 2OH- + Cl2 -> 2 ClO- + H2
thus generating hypochlorite. The first target for making chlorate however is
hypochlorite, to be oxidized to chlorate, so this process must generate
hypochlorite and therefore mixing should take place.
3 ClO- -> ClO3- + 2 Cl- and therefore the chloride ions will react again with the OH-. So the total reaction (helped by the electric energy) is: 2Cl- + 3 H2O -> 2 ClO3- + 3 H2 The oxidation state of the chlorine will be from -1 (Cl-) to +5 (ClO3-), which requires 6 electrons per Cl- ion. Theoretically one mol electrons is equivalent by the physical constant of Faraday which is 96560 Coulombs (Ampere-seconds), which is nearly 27 Ampere-hours per electron (mole). To oxidize one mole of Cl- to ClO3- costs 6 * 27 = 162 Ah. For one mole KCl (74.5 grams) to KClO3 (122.5 grams) one needs 162 Ah in theory. In practice it is more, estimate about 200 Ah. An extensive explanation of the reactions taking place and the pH control is described in this document. Additional requirements
How to set upDissolve around 100 grams of KCl (or diet salt which consists of about 50% NaCl and 50 % KCl) in 0.3-0.6 liters of water and let it boil. Pour this into the jar (carefully, as it will break otherwise at the quick temperature change). Put the thermometer in the jar. Newer diet salt consists of even 67% KCl and 33% NaCl, which is even better. Connect the anode with the red (+) clamp of the supply and the cathode with the black (or white) (-) clamp. Set the ammeter in series with the cell (with correct polarity). Set the power supply in the lowest possible current and check whether everything is connected well and no short-circuiting can take place. Run the electrolysisNow turn on power. When the current is low, turn it up (e.g. by turning on 'quick charging' and/or 12 V instead of 6 V).NOTE: Check that the voltage with the load on does not exceed 6 volts, otherwise the anode might erode far more quickly, particularly when you are using an MMO anode. A computer power supply supplies 5 volts with 10-20 amperes. When you are using a car battery charger, you can use a power controller and lower this until the voltage is about 5 volts. Watch the current and temperature. The current should not exceed the rating of the supply and the best temperature is between 50 and 70oC. Let it run for several hours at the optimum current and temperature, after determining these by experience. Check the water level and, when needed, add some water, as something evaporates. For 0.3-0.4 liter of solution about 240-360 Ampere-hours are needed, thus 24-26 h for 10 A continuous current. Note that the carbon rod will erode and the solution will become black because of small carbon particles.You can reduce this by keeping the voltage below 4.5 volts and the pH not in the basic range (i.e. keep is alightly below 7). When you interrupt it (e.g. you do not want to let it run while you are not at home) remove the electrodes from the cell. Collecting and cleaning the crystals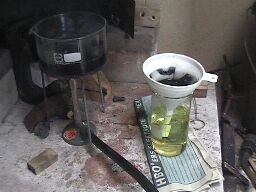
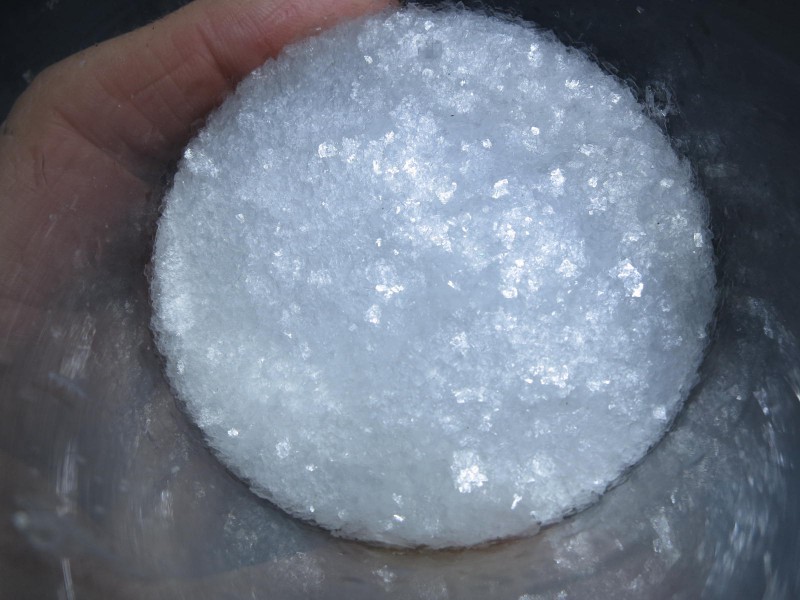
As KClO3 has a poor solubility in cold water, but a good one in hot water, while other salts (like NaCl, KCl and NaClO3) dissolve much better in cold water, one can let crystallize out the KClO3 and obtain it rather purely. 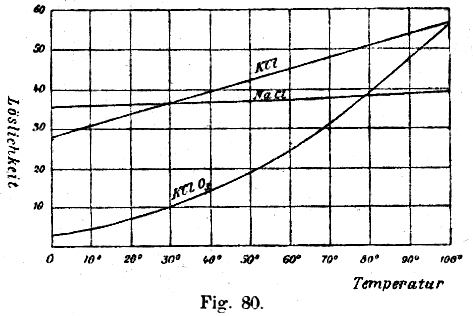
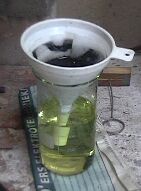
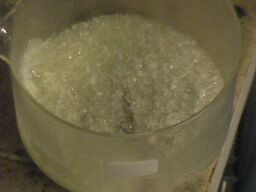
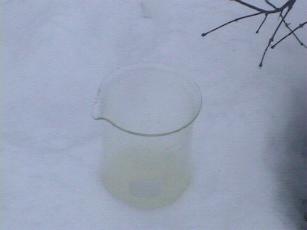
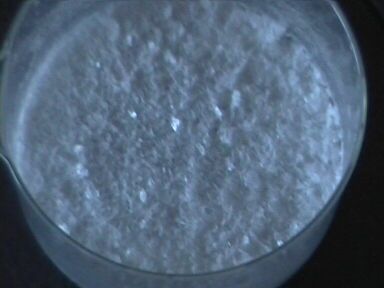
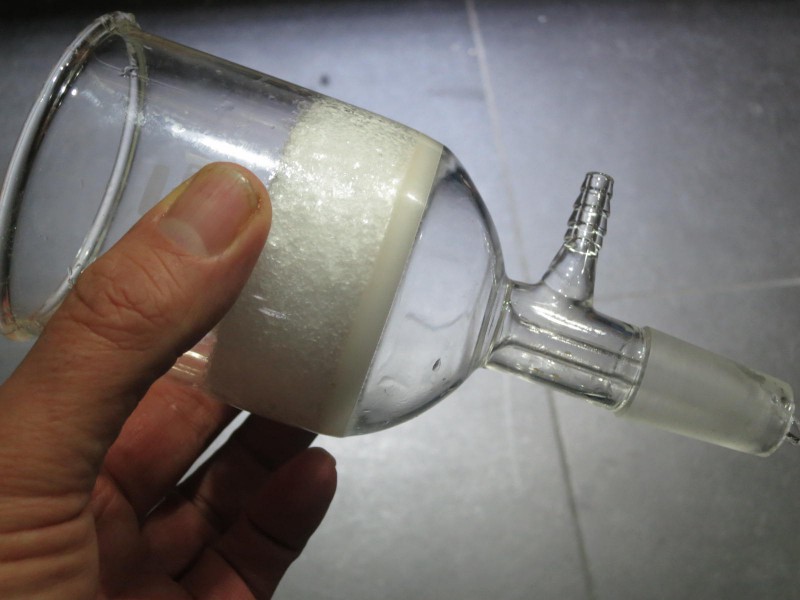
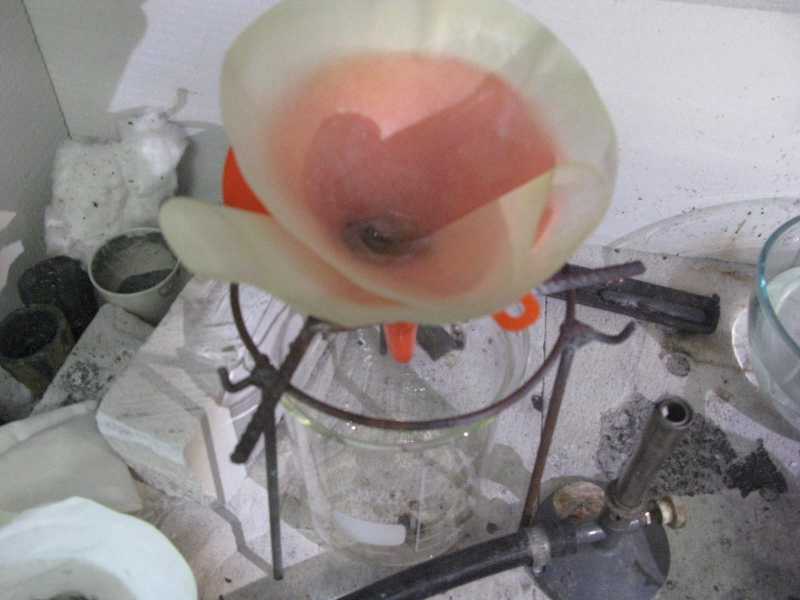
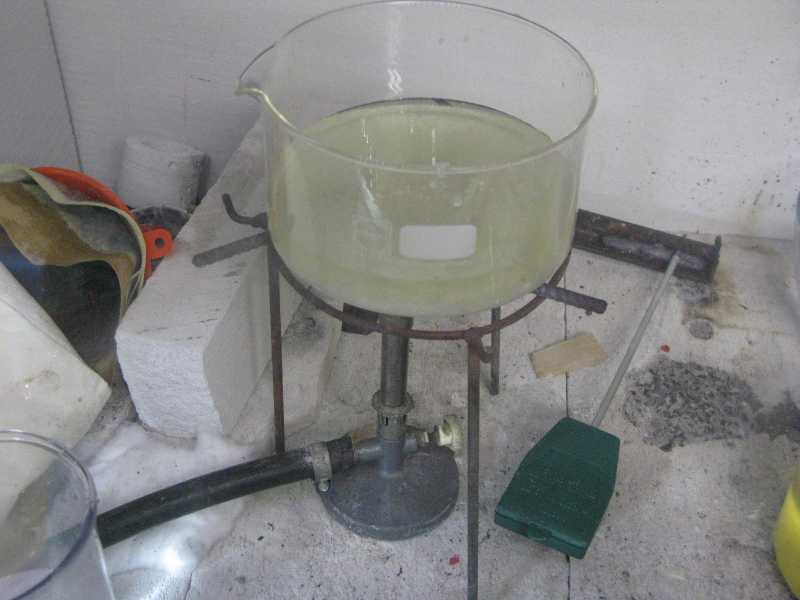
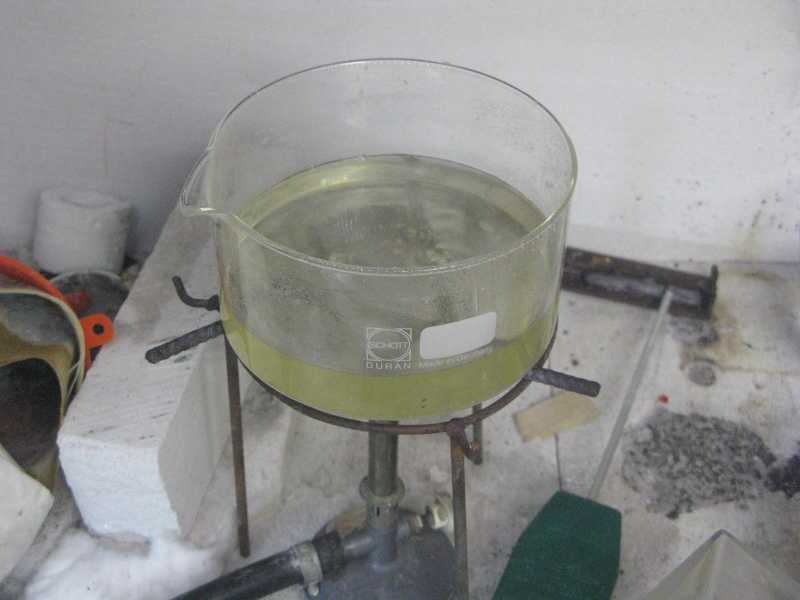
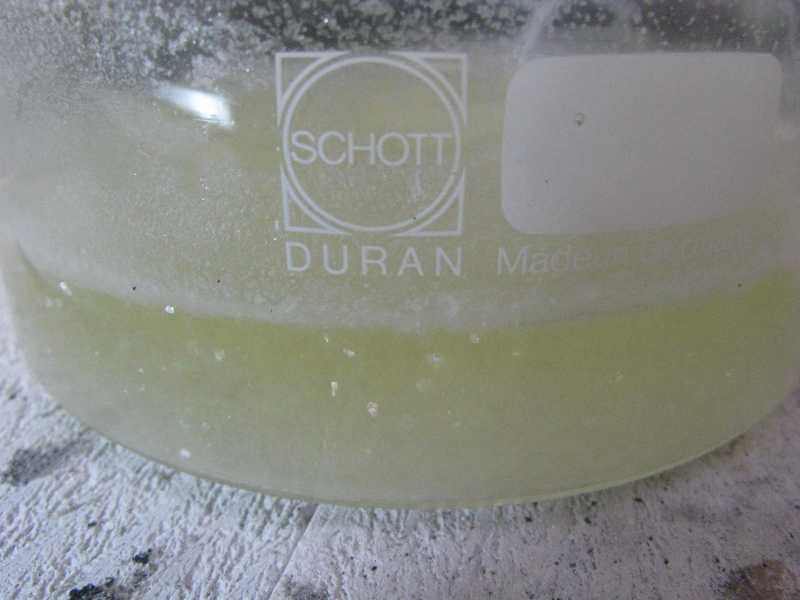
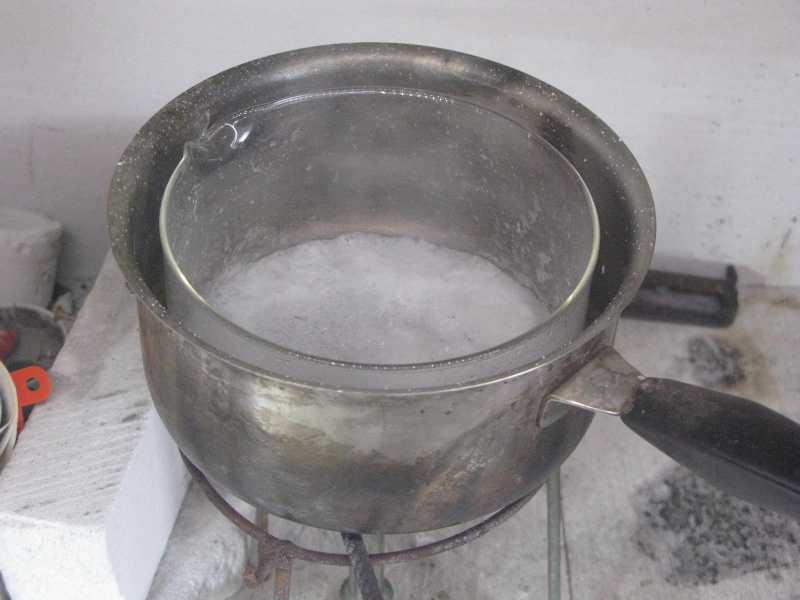
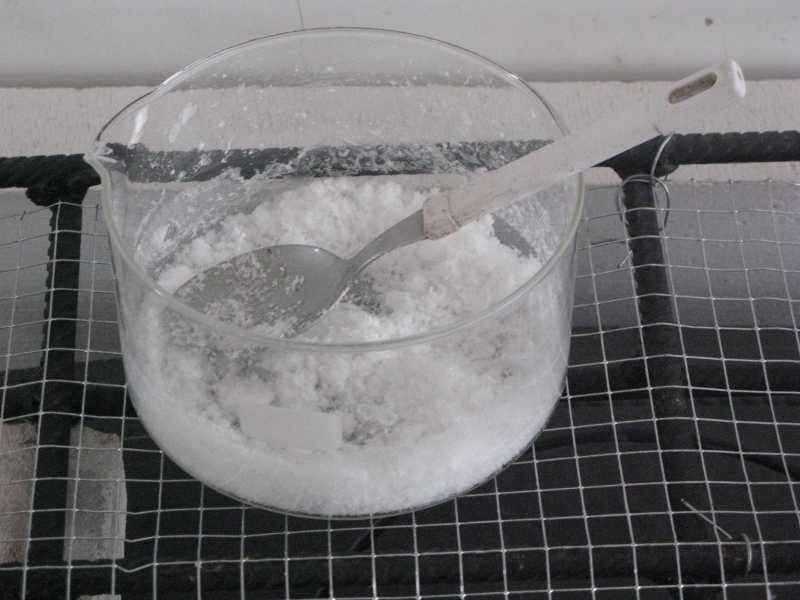
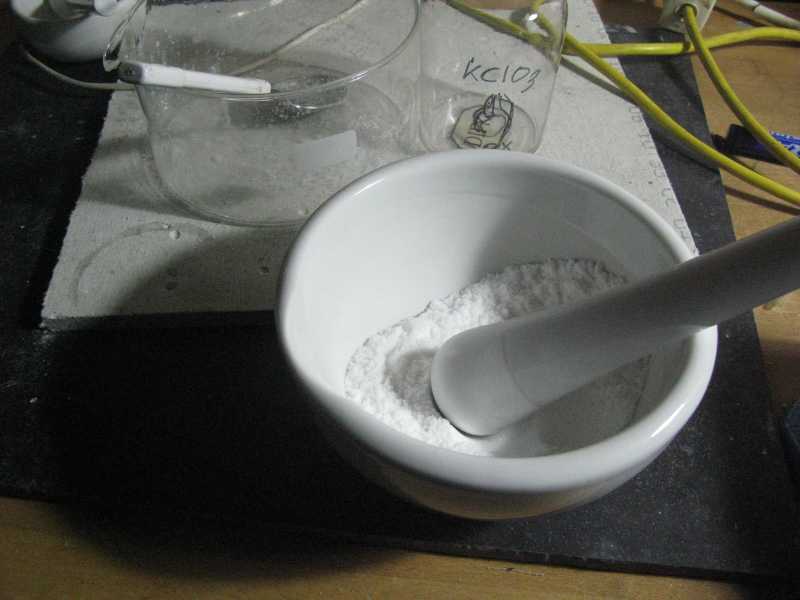
Source: W. Ostwald: Grundlinien der Anorganischen Chemie (Fundamentals of Inorganic Chemistry) Steinkopff Verlag Dresden, Germany, 1919. After it is finished, pour the liquid in a beaker or stainless steel pan which should be heated up to boiling point. Prepare another heat-resistant beaker or pan with a filter in a funnel on it. When you have coffee filters, use two or three filters at a time. When the liquid boils, pour it carefully in the filter. A clear liquid should appear from the low end of the funnel. It can be yellowish colored, because of oxidation of the iron in the cathode to yellow Fe3+ by some chlorine. When all liquid is passed through the funnel, let it cool down to as low as possible, possibly put it in the freezer or fridge after it has air-cooled. Do not allow to let the solution to freeze, as the container may crack. Now large white crystals should appear on the bottom of the beaker. Pour gently off the liquid into another container while holding back the crystals. The liquid can be mixed with a fresh KCl solution for a new electolysis session. Pour some ice-cold water (from the fridge or freezer) over the crystals (no more volume than the crystals) to rinse off other salt solution. Pour off any water and put the beaker with the crystals on a heat source and heat is with a very soft flame. Allow any water to evaporate. When the crystals are dry, scrape it from the beaker and collect it on an old newspaper or a cardboard. Then put them together into a mortar and crush the crystals. A good test for the purity is :
Last update: 2018 January 20 | |||||||||||||||||||||||||||||||||||||||||||||||||||||||||||||||||||||||

Powered, developed under Linux  and Mac
  and hosted under Linux.
This site is best viewed with Firefox, Safari, Chrome and Opera. Using landscape mode on a smartphone gives a better view.