- Start page
- NEWly buily paintcan furnace June 2020
- Newly buily barrel furnace June 2018
- Videos from several experiments
- Home made fume hood
- Alloying nickel silver
- Making sphecical domes of silver
- Making a flat ring of silver
Arc melting experiments
Test run of a 140 Amp DC arc for making Calcium carbide CaC2 by charcoal and CaO. In 2015 I purchased a 200 A DC welder for the purpose it is designed for: better welding results. Stick welding goes much better and smoother. But I could not resist the temptation to (ab)use the device for electric arc experiments, as not only for welding, but also for arc melting a DC arc has better results. I did a few tests in the end of October 2015 with (again) making CaC2 with CaO and crushed charcoal. It turned out that electrode wear was less, when the furnace is hot, the rods can be taken further apart (up till 5cm at 90 A) which makes a larger zone hot enough to synthesize CaC2 which requires over 2000°C. Heating up aluminum to its boiling point (2500°C) was another challenge: I got this done for a few grams of aluminum in less than a minute. Videos of experimentsAnother carbide making test Mixing charcoal with CaO powder and heating it in an electric arc to over >2200°C in which carbide is formed. The resulting calcium carbide CaC2 is thrown into water and releases Acetylene C2C2, 2018 Nov 24 Mixing charcoal with CaO powder and heating it in an electric arc to over >2200°C in which carbide is formed. The resulting calcium carbide CaC2 is thrown into water and releases Acetylene C2C2, 2018 Nov 24
SiO2 sand and Aluminum Heating aluminum snippets with silica sand in a 110A DC arc and resulting in elemental silicon (2015 Dec 25)
Making CaC2 with the DC welder 2015 Oct 31 CaO powder mixed with crushed charcoal in a DC electric arc furnace.
Boiling Aluminum 2015 Oct 22 Melting a few grams of aluminum and bring to its boiling point with a DC welder as an electric arc furnace.
Melting small quantity of steel 2014 Oct 14 Melting 20 grams of steel from a rebar in less than a minute.
Another experiment of making Calcium carbide CaC2 from lime powder and charcoal 2014 Feb 11 Making CaC2 using the electric arc and letting it react with water.
Making Calcium carbide CaC2 from lime powder and charcoal 2013 Dec 2 Another CaC2 making using the electric arc and letting it react with water.
| |||||||||||||||||||||||||||||||||||||||||||||||||
|
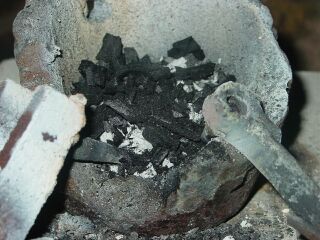
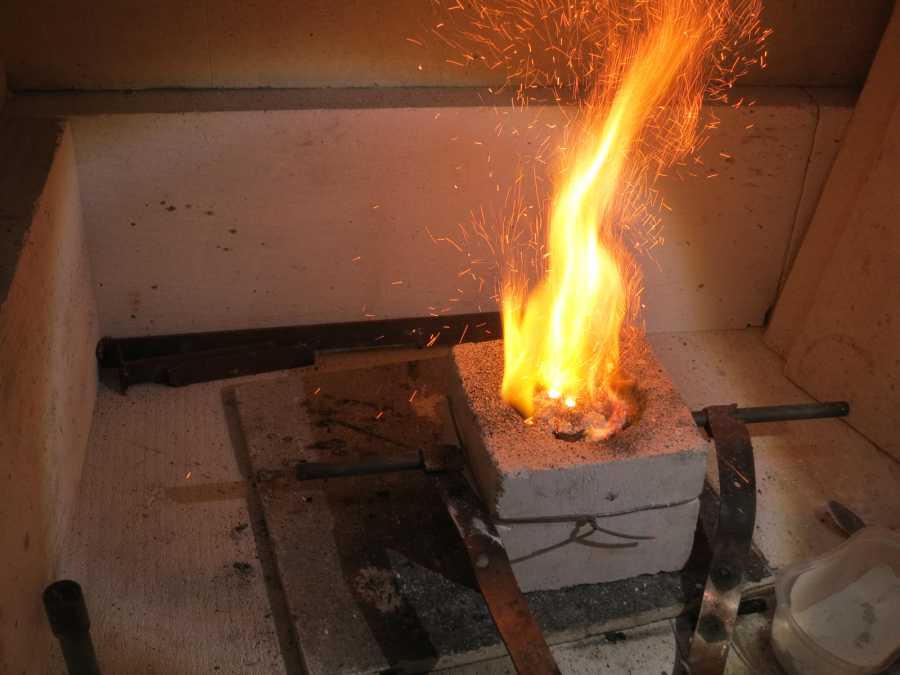
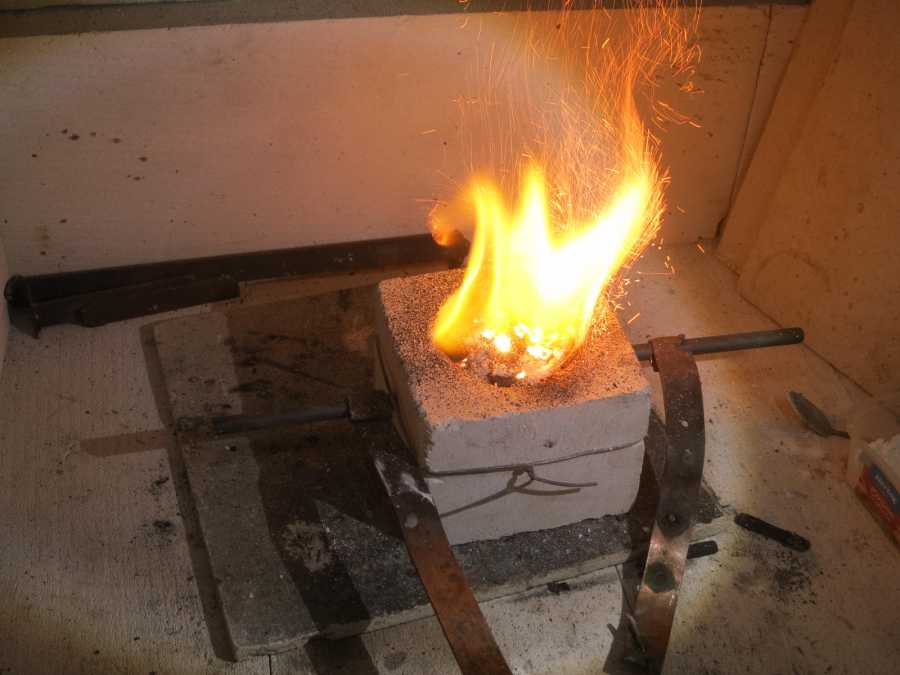
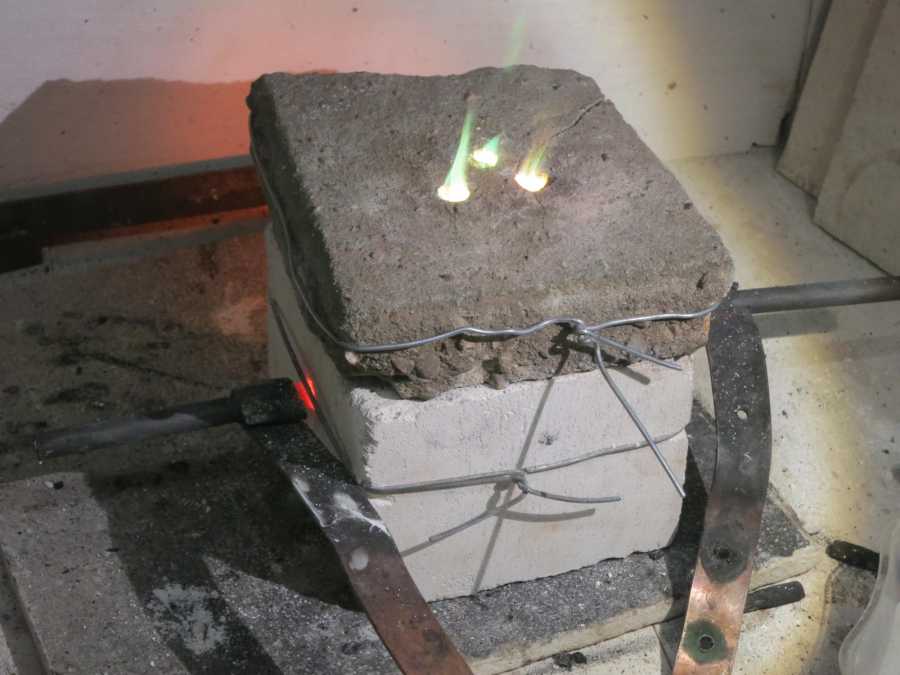
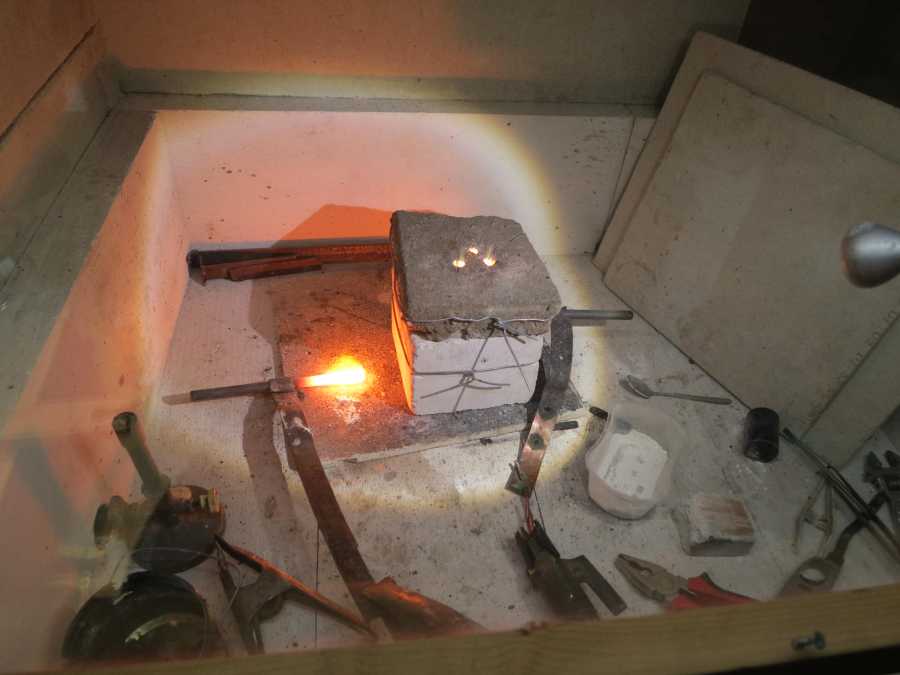
On 2013 Nov 27 I tested an YTONG box filled with crushed charcoal in it and put some CaO powder over it. I put two 10mm carbon electrodes through each side of the furnace and let it run for 2 minutes. After some experiments (February 2014) it turned out that carbide has really formed this way. During reaction
CaO + 3 C => CaC2 + CO the CaC2 is formed in its liquid state as the melting point is 2300°C and the arc temperature is higher. Such extreme temperatures (2000-2500°C) are required to favor the reaction to the right. The molten carbide mixes with crumbled charcoal and ash. After cooling, black chunks which feel like cookies can be got from the remains. Throwing them into water releases lots of acetylene gas (C2H2) which catches fire with a bright sooting flame when ignited.CaC2 + 2 H2O => C2H2 + Ca(OH)2
Older videosSpectrum of arc melting Arc melting metals while taking spectrum (Update 2012 Apr 23)
Arc melting magnesia Arc melting magnesia MgO (Update 2012 Apr 20)
Arc melting steel Arc melting steel (Update 2010 Dec 12)
Boiling aluminum and copper Boiling aluminum and copper (2010 Dec 25)
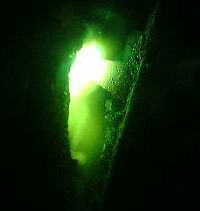
IntroductionUnits are expressed in metric and prices in US dollars, unless otherwise stated.An electric arc is a plasma of ionized gas which conducts electricity. Some industrial processes are based upon this like some steel melting and, the most widely used application is arc welding. In the past it was used for lighting as well, particularly for searchlights and cinemas. In this experiment heat transfer takes place mainly by blowing the plasma (like a torch) on the metal to be melted. You actually see a 'flame'. The color of the flame is heavily dependant on the medium which is heated. It matches the spectrum of the medium. When melting iron (or welding) it is blue, when heating lime it is pink (color of calcium), aluminum a bit bluish. As virtually every substance vaporizes and gets volatile, the spectral flame color every substance is visible, unlike an ordinary propane flame (max. 1400°C) or even oxyfuel flame (max 2500°C). As stated above it melts (mp 2600°C) and vaporizes lime (CaO) easily with a pink arc color.The arc itself reaches easily temperatures over 3500°C, and in an enclosed space of firebricks the temperature close to the arc can reach easily 3000°C as it easily melts magnesia at 2800°C. It can be very interesting to view the arc with a specroscope like I did. Overview of features:
Experiments December 2010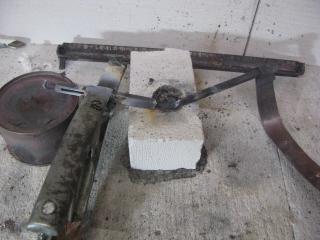 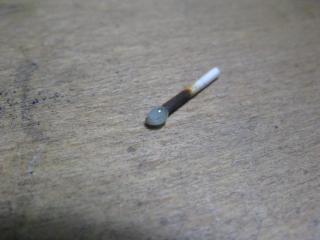 Experiments 2009 Nov 21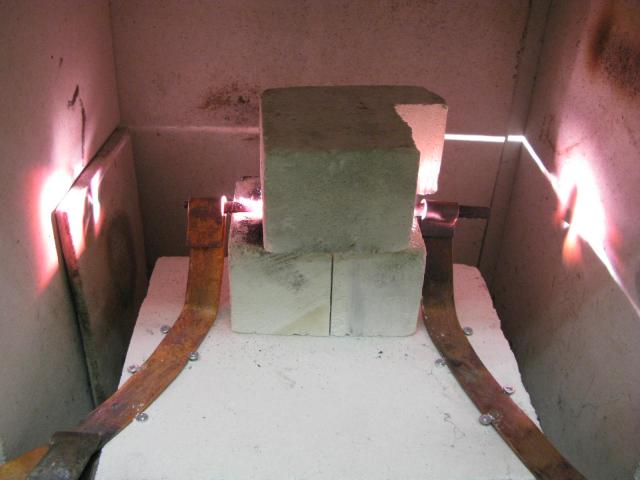
Test run of newly made test furnace after the design of Henri Moissan's furnace. 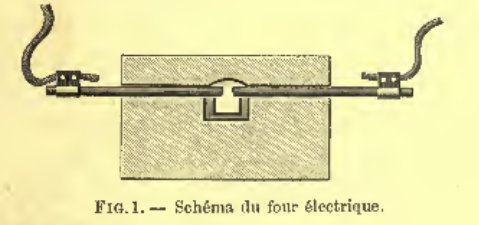
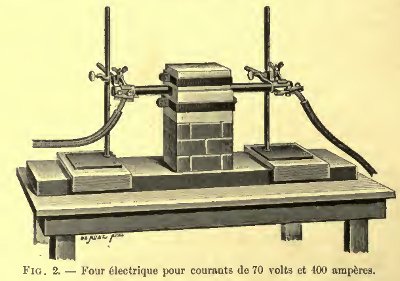
Images in Moissan's book of his setup. 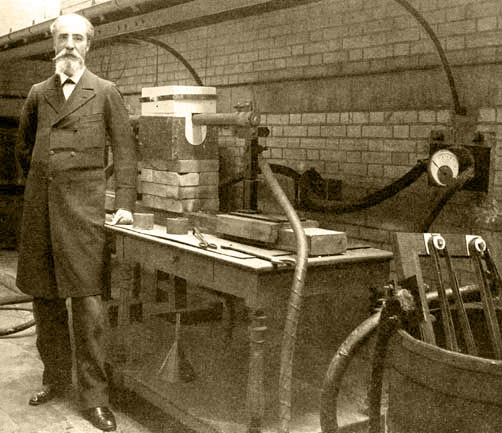 Moissan with his furnace. In 1897 Henri Moissan performed extensive experiments with the electric arc furnace and he publihed this in his book. This had a great impact on the metallurgical (particular steel) industry as electric arc furnaces are used more and more in recent years. The picture above is from his book. So this inspired me to perform some of it with as an electric welder connected to the mains as a power source. Later (22 nov) I made the same bricks as described above, but now from cheap YTONG inner wall blocks (which are not designed as refractory). This resulted in melting as well but not as quickly despite these bricks already melt at 1400°C, but these are denser. How to perform experimentsImportant ! Additional safety

Needed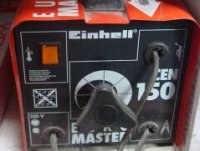 A transformer yielding low voltage and high current (at least 100 A), preferably yielding DC
does a good job. Electric welders, even the cheap hardware store AC buzzboxes do well. They are usually
available for under $100 complete with welding mask, electrode holder (handpiece) and clamp.
A transformer yielding low voltage and high current (at least 100 A), preferably yielding DC
does a good job. Electric welders, even the cheap hardware store AC buzzboxes do well. They are usually
available for under $100 complete with welding mask, electrode holder (handpiece) and clamp.
 Carbon rods. One option is using flat 4.5 V batteries with each three cells of which each cell
has a carbon rod of 6mm (1/4") diameter * 80 mm. These batteries cost about $2-$3 each. But the remaining
black slurry should be treated as hazardous waste and can leave unwashable stains as it is manganese
dioxide (MnO2).
Carbon rods. One option is using flat 4.5 V batteries with each three cells of which each cell
has a carbon rod of 6mm (1/4") diameter * 80 mm. These batteries cost about $2-$3 each. But the remaining
black slurry should be treated as hazardous waste and can leave unwashable stains as it is manganese
dioxide (MnO2).
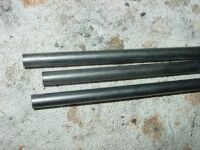
A better option is graphite stirring rods of 6-12 mm diameter (1/4"-1/2") used for foundrywork, available in jewelry casting supply shops. Take enough rods. Rods are consumed too due to combustion and vaporization. One 4.5 battery rod is consumed completely after 15-30 minutes of use, spread over more 'sessions'. Charcoal chips may work as well, but they tend to break very easily. 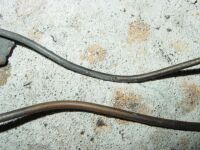 Thick copper wire of at least 3 mm diameter (6 mm2), e.g. grounding wire. Remove the
(usually yellow/green) insulation if present. Anneal before use to enable easy bending.
Thick copper wire of at least 3 mm diameter (6 mm2), e.g. grounding wire. Remove the
(usually yellow/green) insulation if present. Anneal before use to enable easy bending.
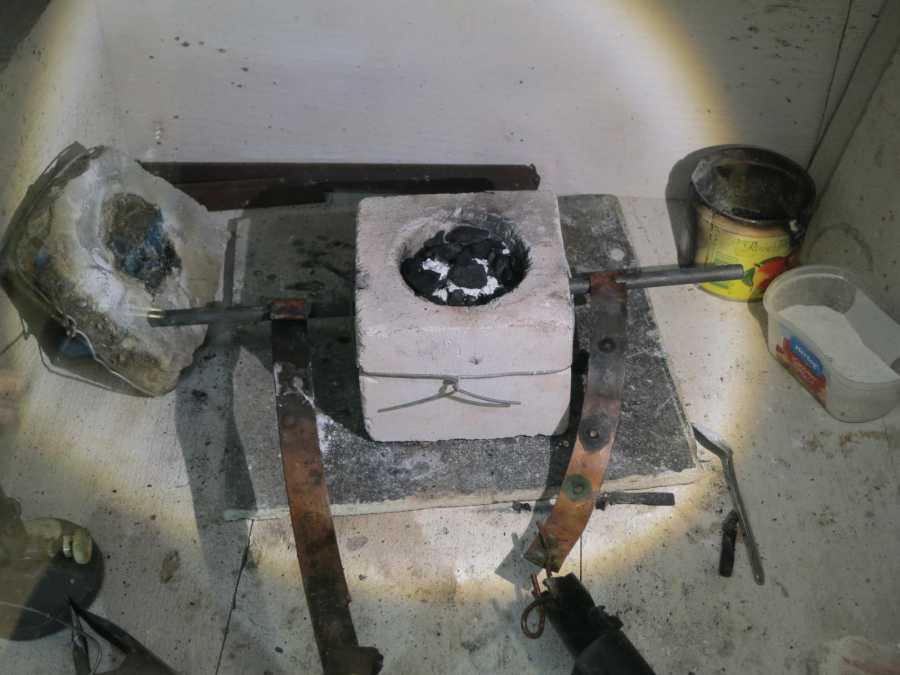
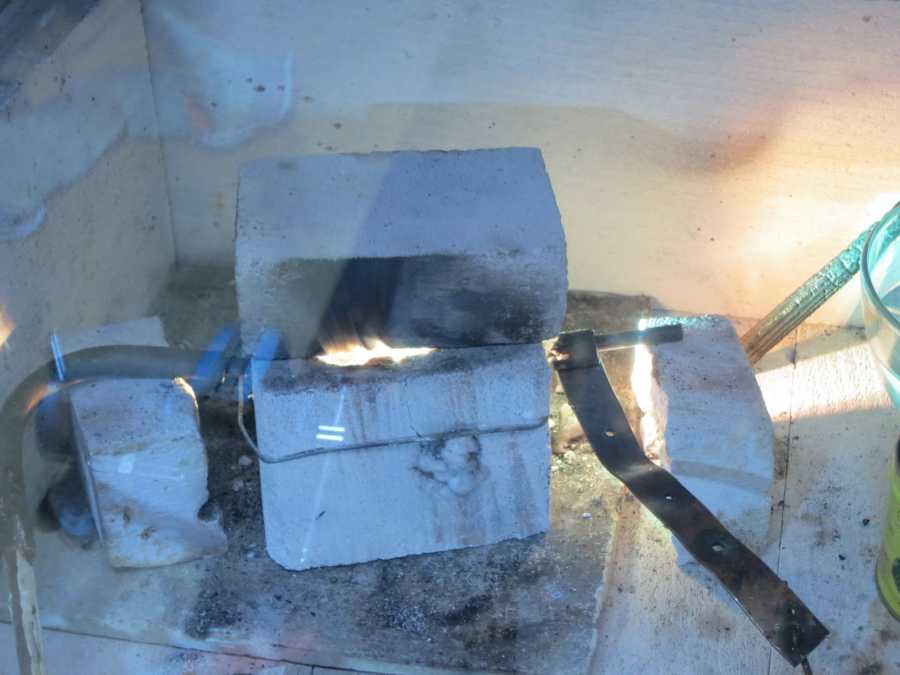
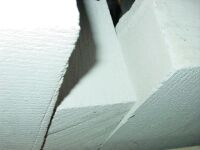 High-grade refractory which insulates well. Magnesia based refractories are best but alumina
works well. Chamotte absorbs much heat. The gypsum based building blocks for inner walls from YTONG designed for insulating inner walls of buildings, do
well (see picture left) because of their excellent insulation properties. It will melt at about
1400°C, so some slag will be formed around the arc area.
High-grade refractory which insulates well. Magnesia based refractories are best but alumina
works well. Chamotte absorbs much heat. The gypsum based building blocks for inner walls from YTONG designed for insulating inner walls of buildings, do
well (see picture left) because of their excellent insulation properties. It will melt at about
1400°C, so some slag will be formed around the arc area.
When not available, even ordinary bricks or concrete tiles can be used, as the extreme heat only occurs locally. Sizes of about 5x5x4 cm suffice. Carve a cavity of about 2-3 cm (1") diameter and 1 cm deep in it. This is the "crucible". 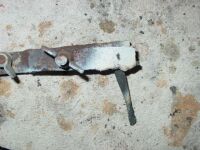 Extra clamp. The clamp of the welder might otherwise be damaged (the carbon rod gets so hot that
where the carbon is in contact with the iron of the clamp, the iron melts too) so that it cannot be used
anymore for welding, where the welder is actually designed for.
Extra clamp. The clamp of the welder might otherwise be damaged (the carbon rod gets so hot that
where the carbon is in contact with the iron of the clamp, the iron melts too) so that it cannot be used
anymore for welding, where the welder is actually designed for.
 A hands-free welding helmet is more useful than an ordinary handheld mask. When holding the
welder's handpiece with one electrode, the other hand is free to feed the metal into the puddle. The
instability of the arc requires hand holding (and moving) of one electrode, so one hand is
'occupied'.
A hands-free welding helmet is more useful than an ordinary handheld mask. When holding the
welder's handpiece with one electrode, the other hand is free to feed the metal into the puddle. The
instability of the arc requires hand holding (and moving) of one electrode, so one hand is
'occupied'.
Schematic overview of the setup Cut about 25 cm from the wire and attach the wire to one carbon rod by e.g. winding it one or two times around the rod. Make a tight connection without any play, otherwise it cannot bear currents of 100 A and more. The other end can just be clamped in the handpiece just like a welding rod. Clamp the other carbon rod in the free extra clamp and clamp that one in the clamp connected to the welder, close to the carbon rod to minimize resistance. Put the end of the latter rod above the center of the crucible. Fix it properly, as the heavy cable to the clamp tends to move the rod away (and fall on inflammable material). Start with a low current (50 A). First test it 'dry' (without metal). Hold the handpiece and let both electrodes touch. You see it sparking and making a sputtering noise. Pull the electrode in the handpiece slowly apart from the other one. The best arc is got when it is long (1 cm), shows a 'flame' and makes a humming sound rather than a loud sputtering sound. When it disrupts, make contact again and pull them apart again. After a few seconds the refractory melts. Even magnesia or pure lime (CaO) show a glossy appearance. You don't see much molten CaO or MgO, not because the temperature is not high enough, but because the boiling point is only 100-200°C above the melting point, so it's rather volatile at the melting point. Now stop the arc and put some nails in the crucible. Start over again. After the arc starts, any iron close to the arc melts. Moving the arc over the nails or pushing the nails to the arc with an old screwdriver may speed up melting. The molten iron tends to contact with the carbon electrode(s), but try to prevent that. Avoid any direct contact of the carbon electrodes with the molten metal if possible. Otherwise the current flows through the iron (and the welder hums loudly, which also happens when an electrode 'sticks' during welding) and the arc is gone. Moreover the iron gets contaminated with the carbon and gets cast iron. After one minute you'll see that everything is molten. When is does not melt all (it freezes further from the arc) increase the current on the welder. An excellent application is steel casting. As pispot steel (ordinary iron with less than 0.3 % carbon) always takes a little carbon from the rods, it is converted into steel after one melt. This is simple to check. When sawing it with a hacksaw and the saw gets blunt, it's clear it's steel. 
Here is a table which tells the behavior of different substances.
1 Depends on composition. Here, Na2O and CaO containing glasses are considered.
For more info you can mail me.
More info on Wikipedia Last update: 2018-11-25 | |||||||||||||||||||||||||||||||||||||||||||||||||


 Do not make arcs directly on the 230 V or 115 V mains as there is a strong and lethal electrical shock
hazard. Moreover, the current is so low compared to a welder that only minimal amounts (< 1 g of iron)
can be melted. The voltage between the electrodes or one of them and ground should not exceed 42 V for the
same reason. Electric welders usually comply with this rule. In most countries (e.g. Western Europe) sale
of unsafe welders is prohibited.
Do not make arcs directly on the 230 V or 115 V mains as there is a strong and lethal electrical shock
hazard. Moreover, the current is so low compared to a welder that only minimal amounts (< 1 g of iron)
can be melted. The voltage between the electrodes or one of them and ground should not exceed 42 V for the
same reason. Electric welders usually comply with this rule. In most countries (e.g. Western Europe) sale
of unsafe welders is prohibited.
Powered, developed under Linux  and Mac
  and hosted under Linux.
This site is best viewed with Firefox, Safari, Chrome and Opera. Using landscape mode on a smartphone gives a better view.